Binding is my least favorite aspect of quilting. I found the thought of hand stitching the back of a quilt so tiresome that I tried every last way I could think of to find another method. I tried the birthing method (so true to its name), which sometimes for me works well and sometimes leaves the back with ripples which is infuriating. I tried leaving the backing bigger and bringing it up and onto the front, stitching it down, which works but which also requires careful cutting of excess fabric and limits the fabric color options of the binding. I did break down and sew on the front and hand stitch the back and didn't totally hate it (found it relaxing, in all honesty) but it's not a quick method. I also tried the sewing on back and then folding to the front and stitching down the front (with an inner piped binding, even) but found that method could very, very easily look very, very sloppy, especially if one can't stitch in the ditch to save her life.
So I came up with a new idea -- the raggedy binding. I haven't seen it anywhere else, and I've had people ask me about it, so I decided to put together my first tutorial. I consider the raggedy binding to be foolproof, but maybe I suffer foolishness more easily than others...
So here goes -- the raggedy flannel binding. Drum roll, please...
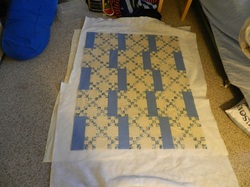
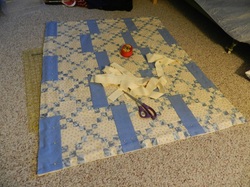
Here's the Project Linus quilt, a baby blanket. It's sandwiched with backing, then batting, then the top.
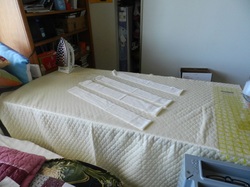
Next I cut strips of flannel (the better quality flannel you use, the better the rag. It's worth buying the good stuff. I recommend solid colors that are the same on both sides, rather than prints). I cut 3" pieces, but I'm going to tell you to cut 4" because it just leaves more room to adjust for error, which is never a bad thing in my book. But if you are a very precise sewist (which I am not), you can use 3" strips. And if your strips are not long enough to run down the length of your quilt, you can simple sew two strips together, no worries.
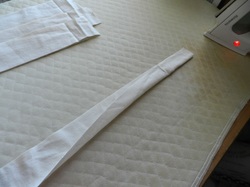
Iron the strips in half lengthwise to form a crease. Flannel doesn't hold the best crease, but it works.
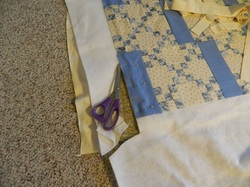
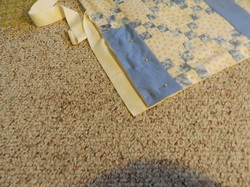
Back to your quilt, pin the layers and trim the top, batting, and backing to an even edge.
All trimmed up.
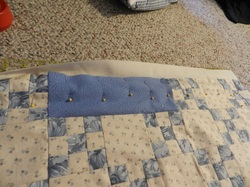
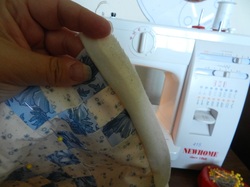
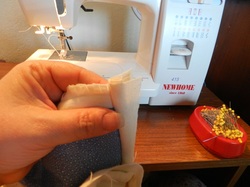
Set the binding strip half under the quilt, so the edge is resting snugly in the crease of the folded strip...and I do mean snugly -- you don't want empty space between the binding and the edge of the quilt.

The ending isn't all that important at this point; it can be trimmed later. It's helpful as a visual to make sure the binding is equally wrapped half on top and half on bottom.
Fold it on and over and pin! I usually do two sides (opposite sides) at a time.
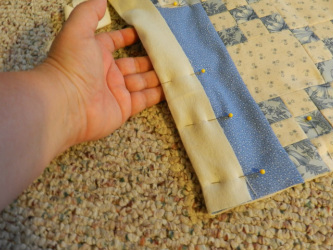
Ready to take to the sewing machine.
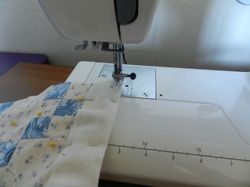
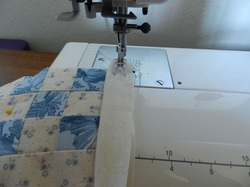
I sew about 3/8" away from the edge, or you could even go 1/2" if you cut 4" strips. The important thing is to catch all the edges of the quilt, which is why I stressed having the quilt edge snuggled into the binding with no empty space. Believe me, I know whereof I speak...
Sew all the way down the edge, double stitching at the start and the finish.
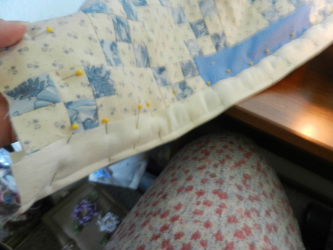
When you've sewn, you want to pull the binding edges backward and outward to make SURE you've caught all the edges. Here I am kindly showing you the mistake I made, where I didn't catch the edge. Normally, this would cause tears and frustration, but as I said, this is practically foolproof. I am just going to sew the edge again, but further in to prevent this.
See my double seam? Not pretty, but still perfectly functional. No tears, no swearing!
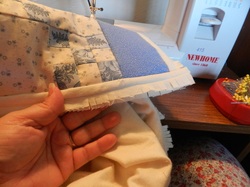
Now I fold those edges back out, making sure the quilt edge is completely encased...
And I sew down the line again, this time just at the edge of the encased quilt edge. It's a pretty easy edge to follow, but I do make mistakes. I feel sure that the more careful sewists out there won't make the errors I have, but I feel just as sure our bindings will look equally good!
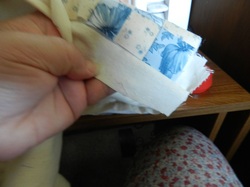
Here it is done -- two seams, one enclosing the other, and two loose flaps of binding.

Here's another example of me messing up -- some of the first fold is extruding from the seam instead of being encased. Oh well! It gets hidden in the raggedyness, so all is well.
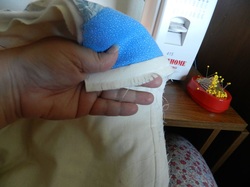
Then, I fringe it. I cut little slits about a quarter inch apart, making sure not to cut deep enough to go past the seam. If you've ever done a raggedy quilt, you are familiar with this part. If you haven't done a raggedy quilt, I will tell you now that you will get tired of clipping, but you have to persevere. I actually have special scissors that are spring-loaded to make cutting raggedy quilts easier, but it's still quite tedious. What works best for me is to trim a side at a time to break up the monotony.
When you go to add the other sides, don't worry about the overlap. You can do whatever you want in terms of what lies over what and by how much. In the end you can trim even and clip, and the raggedy fringe will hide any irregularities.
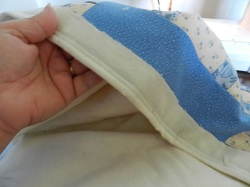
All sewn, all clipped, ready to be tossed in the washer and, more specifically, the dryer, which results in the raggedy trim...
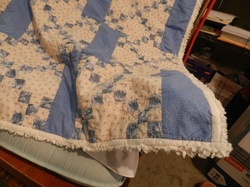
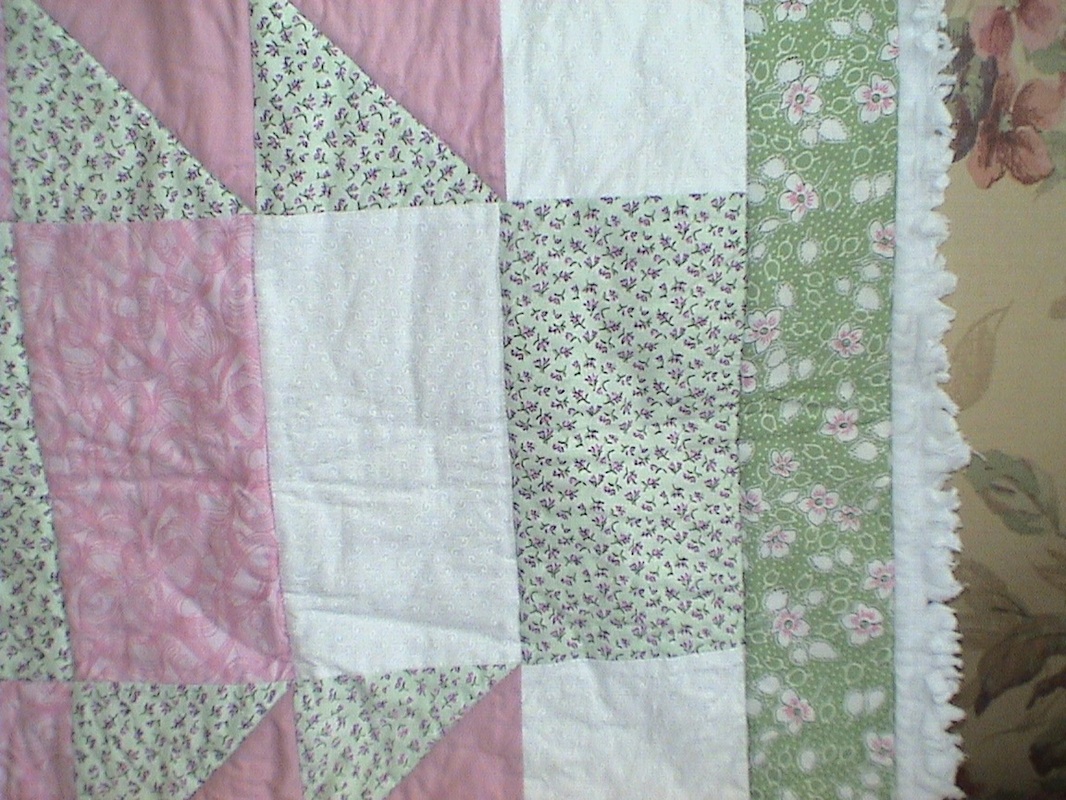
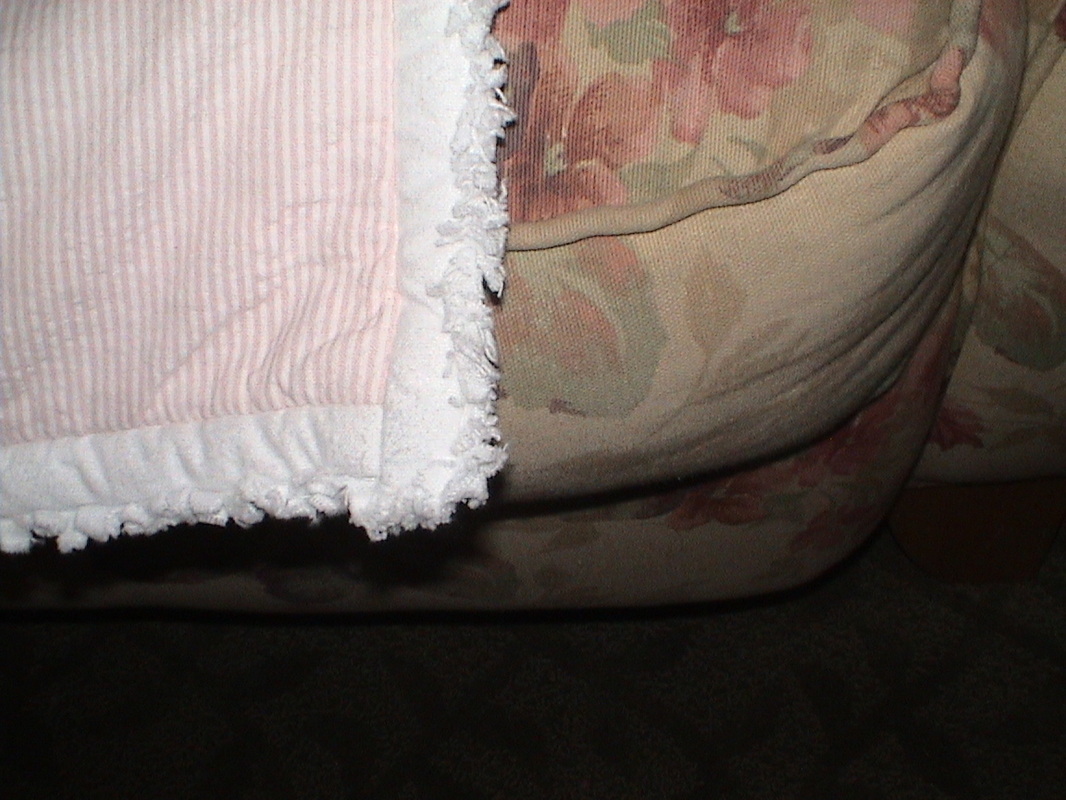
Voila! It looks kind of lacy/fuzzy. It's soft, it's texturally interesting, and it hides a multitude of errors. My kind of binding!
So to reiterate a few points -- the wider the strip, the better, unless you are a fantastically accurate sewist, which I am not. Spend the bucks on better flannel, you will get a better rag. Go with a solid color, because you have to think much harder with prints to make sure the colored side falls right to make the binding look right. Hope that makes sense!
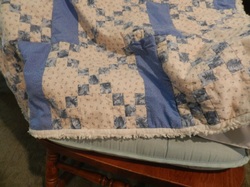
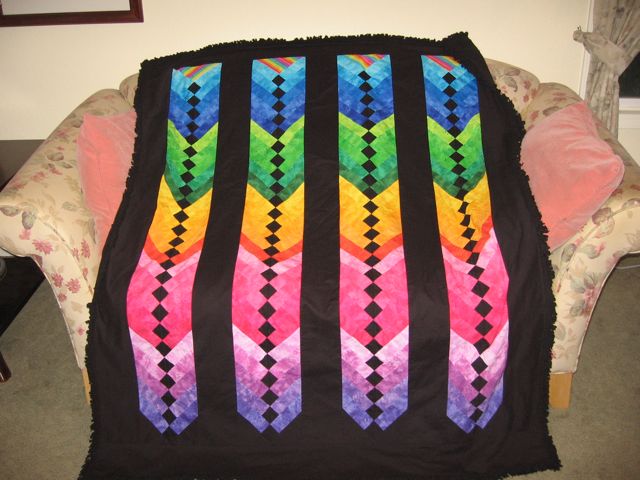
Down below are a few other pics of the raggedy binding.
Down below are a few other pics of the raggedy binding.
 RSS Feed
